Hope you get all the points from the first episode!
If you are familiar with the real DX12 Hello Triangle sample, you might have noticed that the sample I created in episode 1 was incomplete. In this episode, we’ll delve into the full “Hello Triangle” sample and explore some new concepts to understand how to draw this more complete version.
Screenshots of this new sample will be included in this blog, but feel free to download latest version of Intel GPA and open S2-HelloColorTriangle.

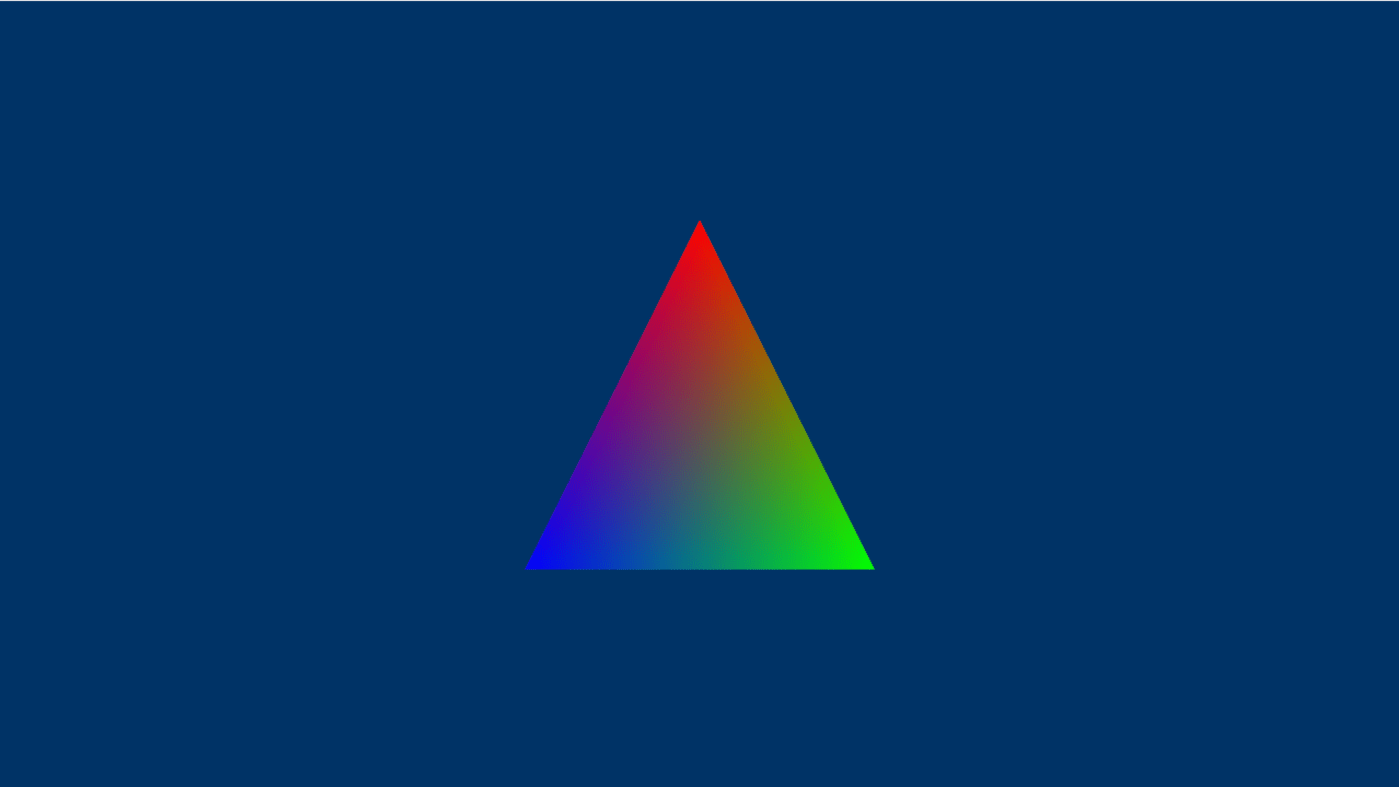
From the result, we can find that the triangle is colorful, and background has been painted to blue. Also, the number of API log has been changed from 1 to 4, adding 3 new calls.
In this blog series, we’ll discuss “ResourceBarrier” in detail in a future episode. For now, it’s important to understand that a ResourceBarrier in DirectX 12 is used to synchronize resource states between different GPU operations. It ensures that resources are not read or written in an inappropriate state, which is critical for correct rendering and performance optimization. Think of it as a traffic controller that manages how different parts of the GPU access memory resources.
Let’s start with “ClearRenderTargetView“.
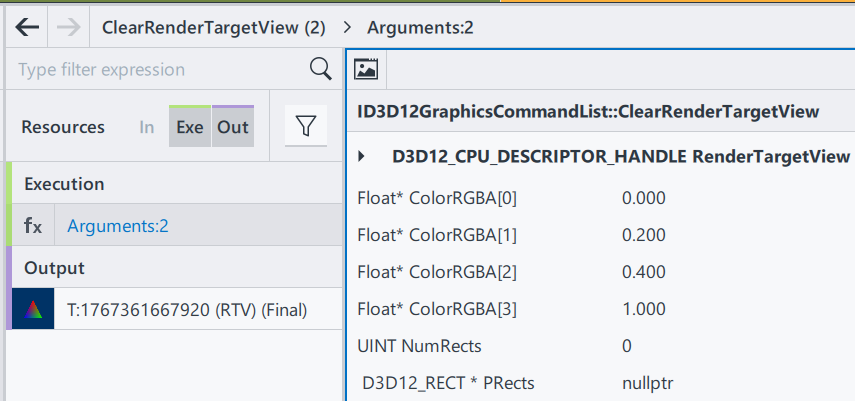
ClearRenderTargetView is a function from DX12 command list. Here from GPA we can easily observe what parameters this function need.

RenderTargetView: Represent the start of the heap to be cleaned
ColorRGBA[4]: a vector of float to represent a color
NumRect/PRects: The target vector of D3D12_RECT objects to be cleaned
If PRects is NULL, ClearRenderTargetView clears the entire resource view instead.
The purpose of this function to fill the entire render target with a single color. This is often used at the beginning of a new frame to clear the remnants of the previous frame’s rendering. Here, by having nullptr in PRects, we are setting up the entire frame to color [0, 0.2, 0.4, 1], a mixed color of blue and green. Since ClearRenderTargetView is before “DrawInstanced”, the cleared color becomes a background automatically.
Then, let’s go to the next section, DrawInstanced. It keeps almost everything the same as the one introduced in episode 1.

Shader Source Code(SH): Same as E1
Pipeline State/Non pipeline state: Same as E1
The only difference is the input vertices buffer.

Position0: Same as E1
Color0: In this example, 3 vertices of the triangle now has different color. Since color values are stored as the order of RGBA, we can tell that:
Index0: top middle (0, 0.44, 0), is red(1, 0, 0)
Index1: bottom left (0.25, -0.44, 0), is blue(0, 1, 0)
Index2: bottom right (-0.25, -0.44, 0), is green(0, 0, 1)
Thus, when we are drawing this triangle on the screen, we are drawing 3 vertices with different color. A question just comes to us: what will happen to the pixels that are in the middle? To well understand this, we will introduce one of the most important terms in computer graphics – Rasterization.
In a word, rasterization is responsible for converting geometry/vector images into pixel information. In our case, the geometry we input is the triangle. We input position and color information of 3 vertices here as a geometry of a triangle, and as for output we will get a set of all pixels that we find belong to the geometry shape, including each pixel’s position and color.
Rasterization process involves combinations of algorithms, and as a series focusing on communications between applications and GPUs, I am not planning to introduce all the math details here in this episode. For now, let’s only remember that a rasterization process can find all necessary pixels through a complex edge determination process, and interpolate all pixels’ color using the given colors.
Then let’s get back to the original question: Why having vertices of 3 different color will give us different colors in different position?
This is because of the algorithm we use in interpolation is Linear interpolation. specifically barycentric interpolation in modern 3D APIs. This method calculates the contribution of each vertex to the target point. For example, if a point is closer to a red vertex, the output will be more red. Each pixel has different distances to the three vertices, resulting in varied colors.
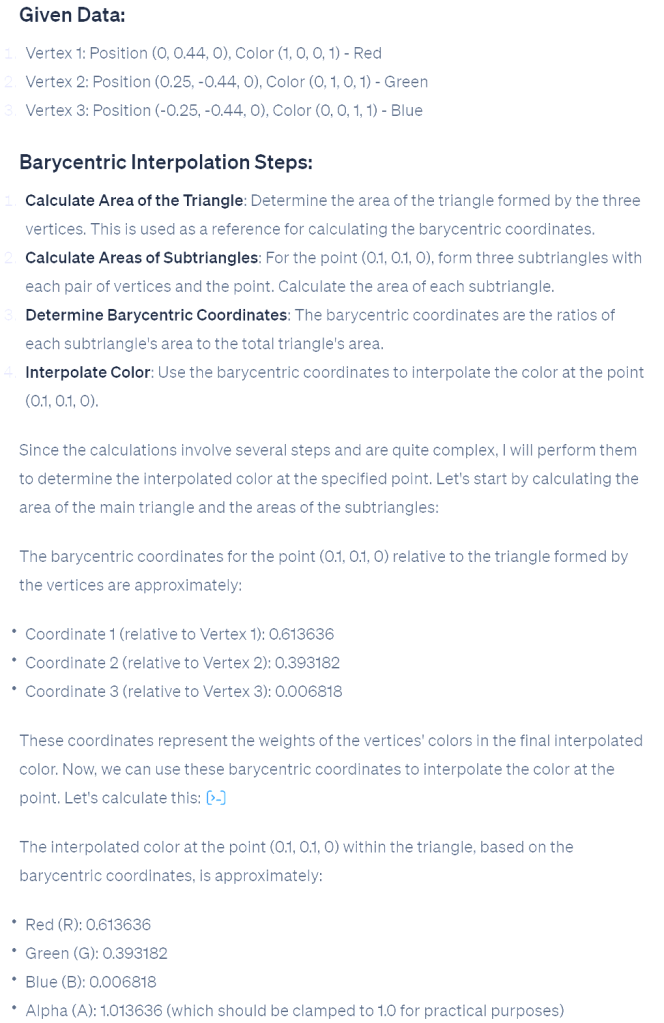
On the right is the process from ChatGPT, on calculating interpolation color value on pixel position (0.1, 0.1,0) in our case.
After calculation, we find the color in that area should be around (0.61,0.39,0,1).
In a graphics pipeline, before getting the final rendering result, there is another step calculating the pixel shader; however in pixel shader we just pass through the value to be the final result.
Here, let’s have a quick peek of the final result in the beginning. The white dot in the middle is (0,0,0,1). Thus, (0.1, 0.1, 0) is on the top right of the white dot, in Quadrant I. We can see that the color is between red and green, and more red; which indicates that our calculation result is correct.

This concludes this episode. I hope it gives you a better understanding of this colorful triangle. Rasterization is a significant topic in computer graphics, but grasping the concept and scope of rasterization is more important than understanding the underlying mathematics. In later episodes, we will continue this learning journey, exploring increasingly complex samples and introducing more concepts step by step.

Leave a comment